Adding Storybook Style Guide to a Create React App
22 Feb 2018In this post (and the above 6 minute embedded video) we’ll look at how to add the Storybook style guide to a React web app boostrapped by create-react-app.
This is the third post in a series about
create-react-app.
Installing Storybook
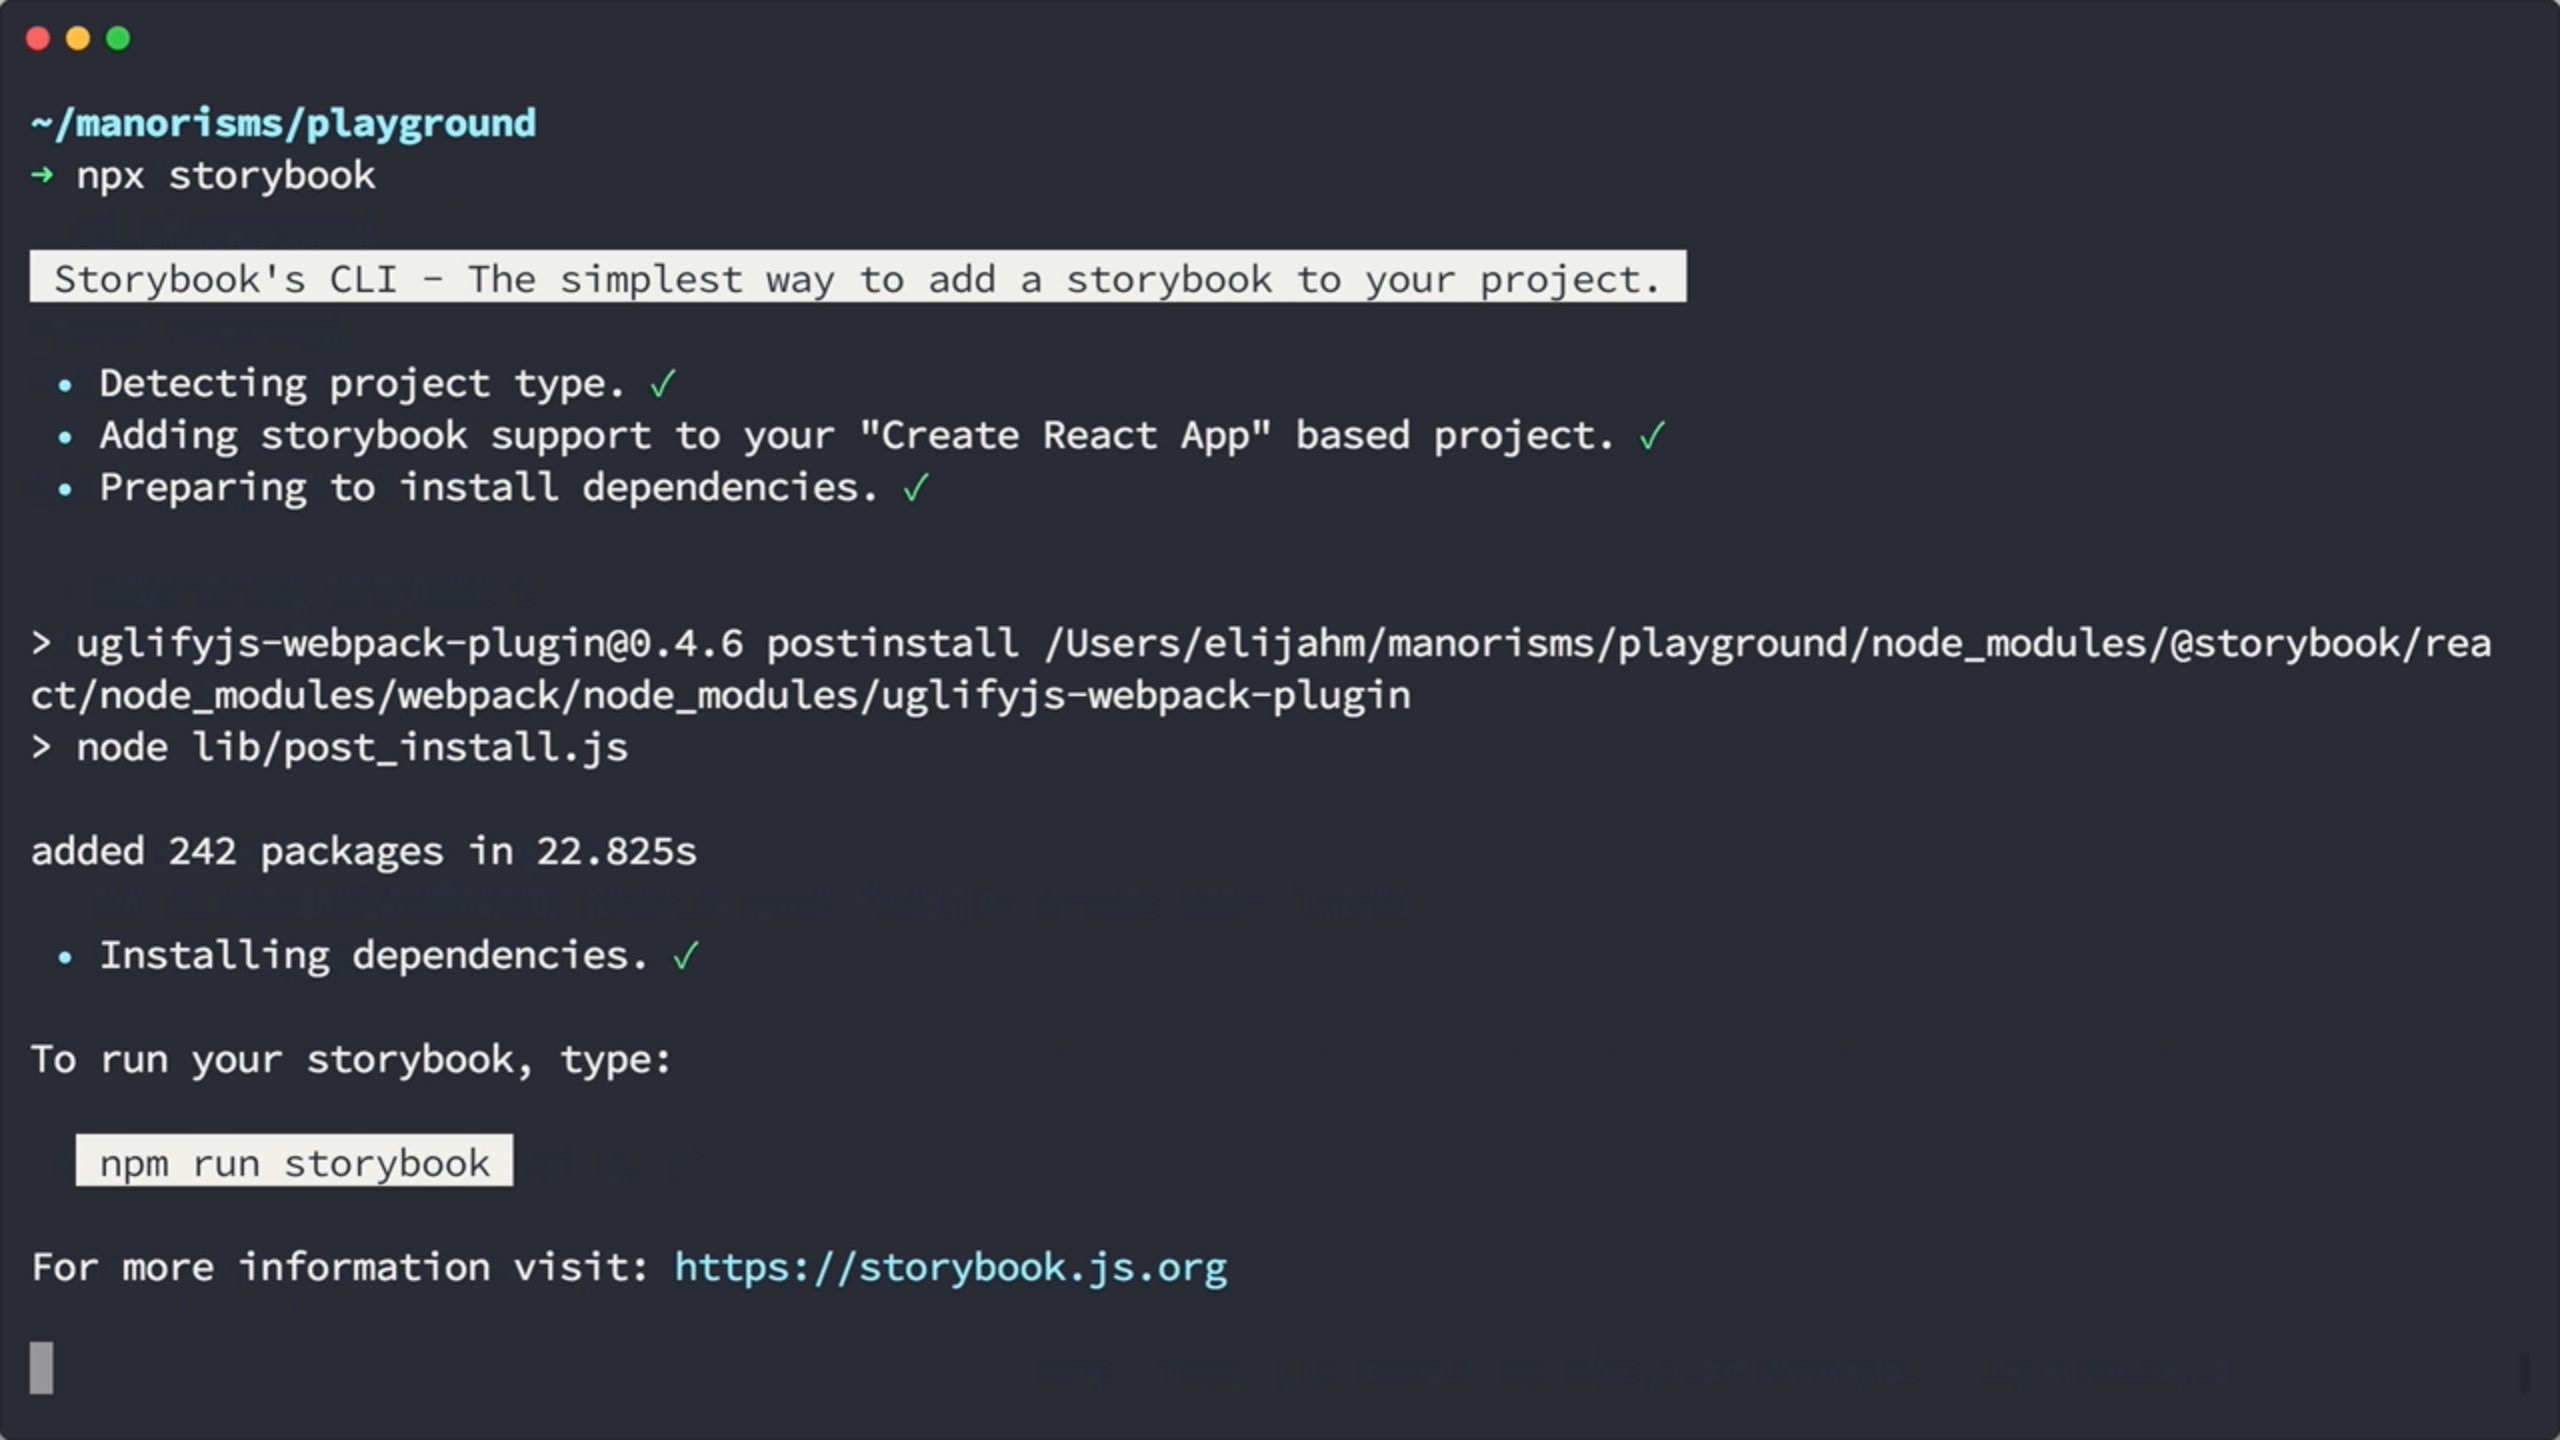
Let’s quickly bootstrap a web app with create-react-app. From the command line we’ll use npx to kick off create-react-app and name our project playground. create-react-app will then generate our app and proceed to install all its necessary node dependencies. Once that’s done, we’ll change directories to our new app and proceed to install storybook into the app by typing npx storybook. At this point, storybook detects the type of app, notices that it was bootstraped by create-react-app, and then proceeds to install its necessary dependencies.
➜ npx create-react-app playground-storybook
➜ cd playground-storybook
➜ npx storybook
Investigating Generated Storybook Files
Once storybook has finished, we can open up VS Code and check out what has changed. You can notice a hidden folder called .storybook that contains 2 files.
.storybook/addons.js
import '@storybook/addon-actions/register';
import '@storybook/addon-links/register';
The addons.js file imports any addons that you might need. In this case, it’s importing the actions and links addons. We will look at how those are used in another file.
.storybook/config.js
Next, we have the config.js file. This is where we tell storybook where to find our story definitions, in this case they are in the ../src/stories folder.
import { configure } from '@storybook/react';

function loadStories() {
  require('../src/stories');
}

configure(loadStories, module);
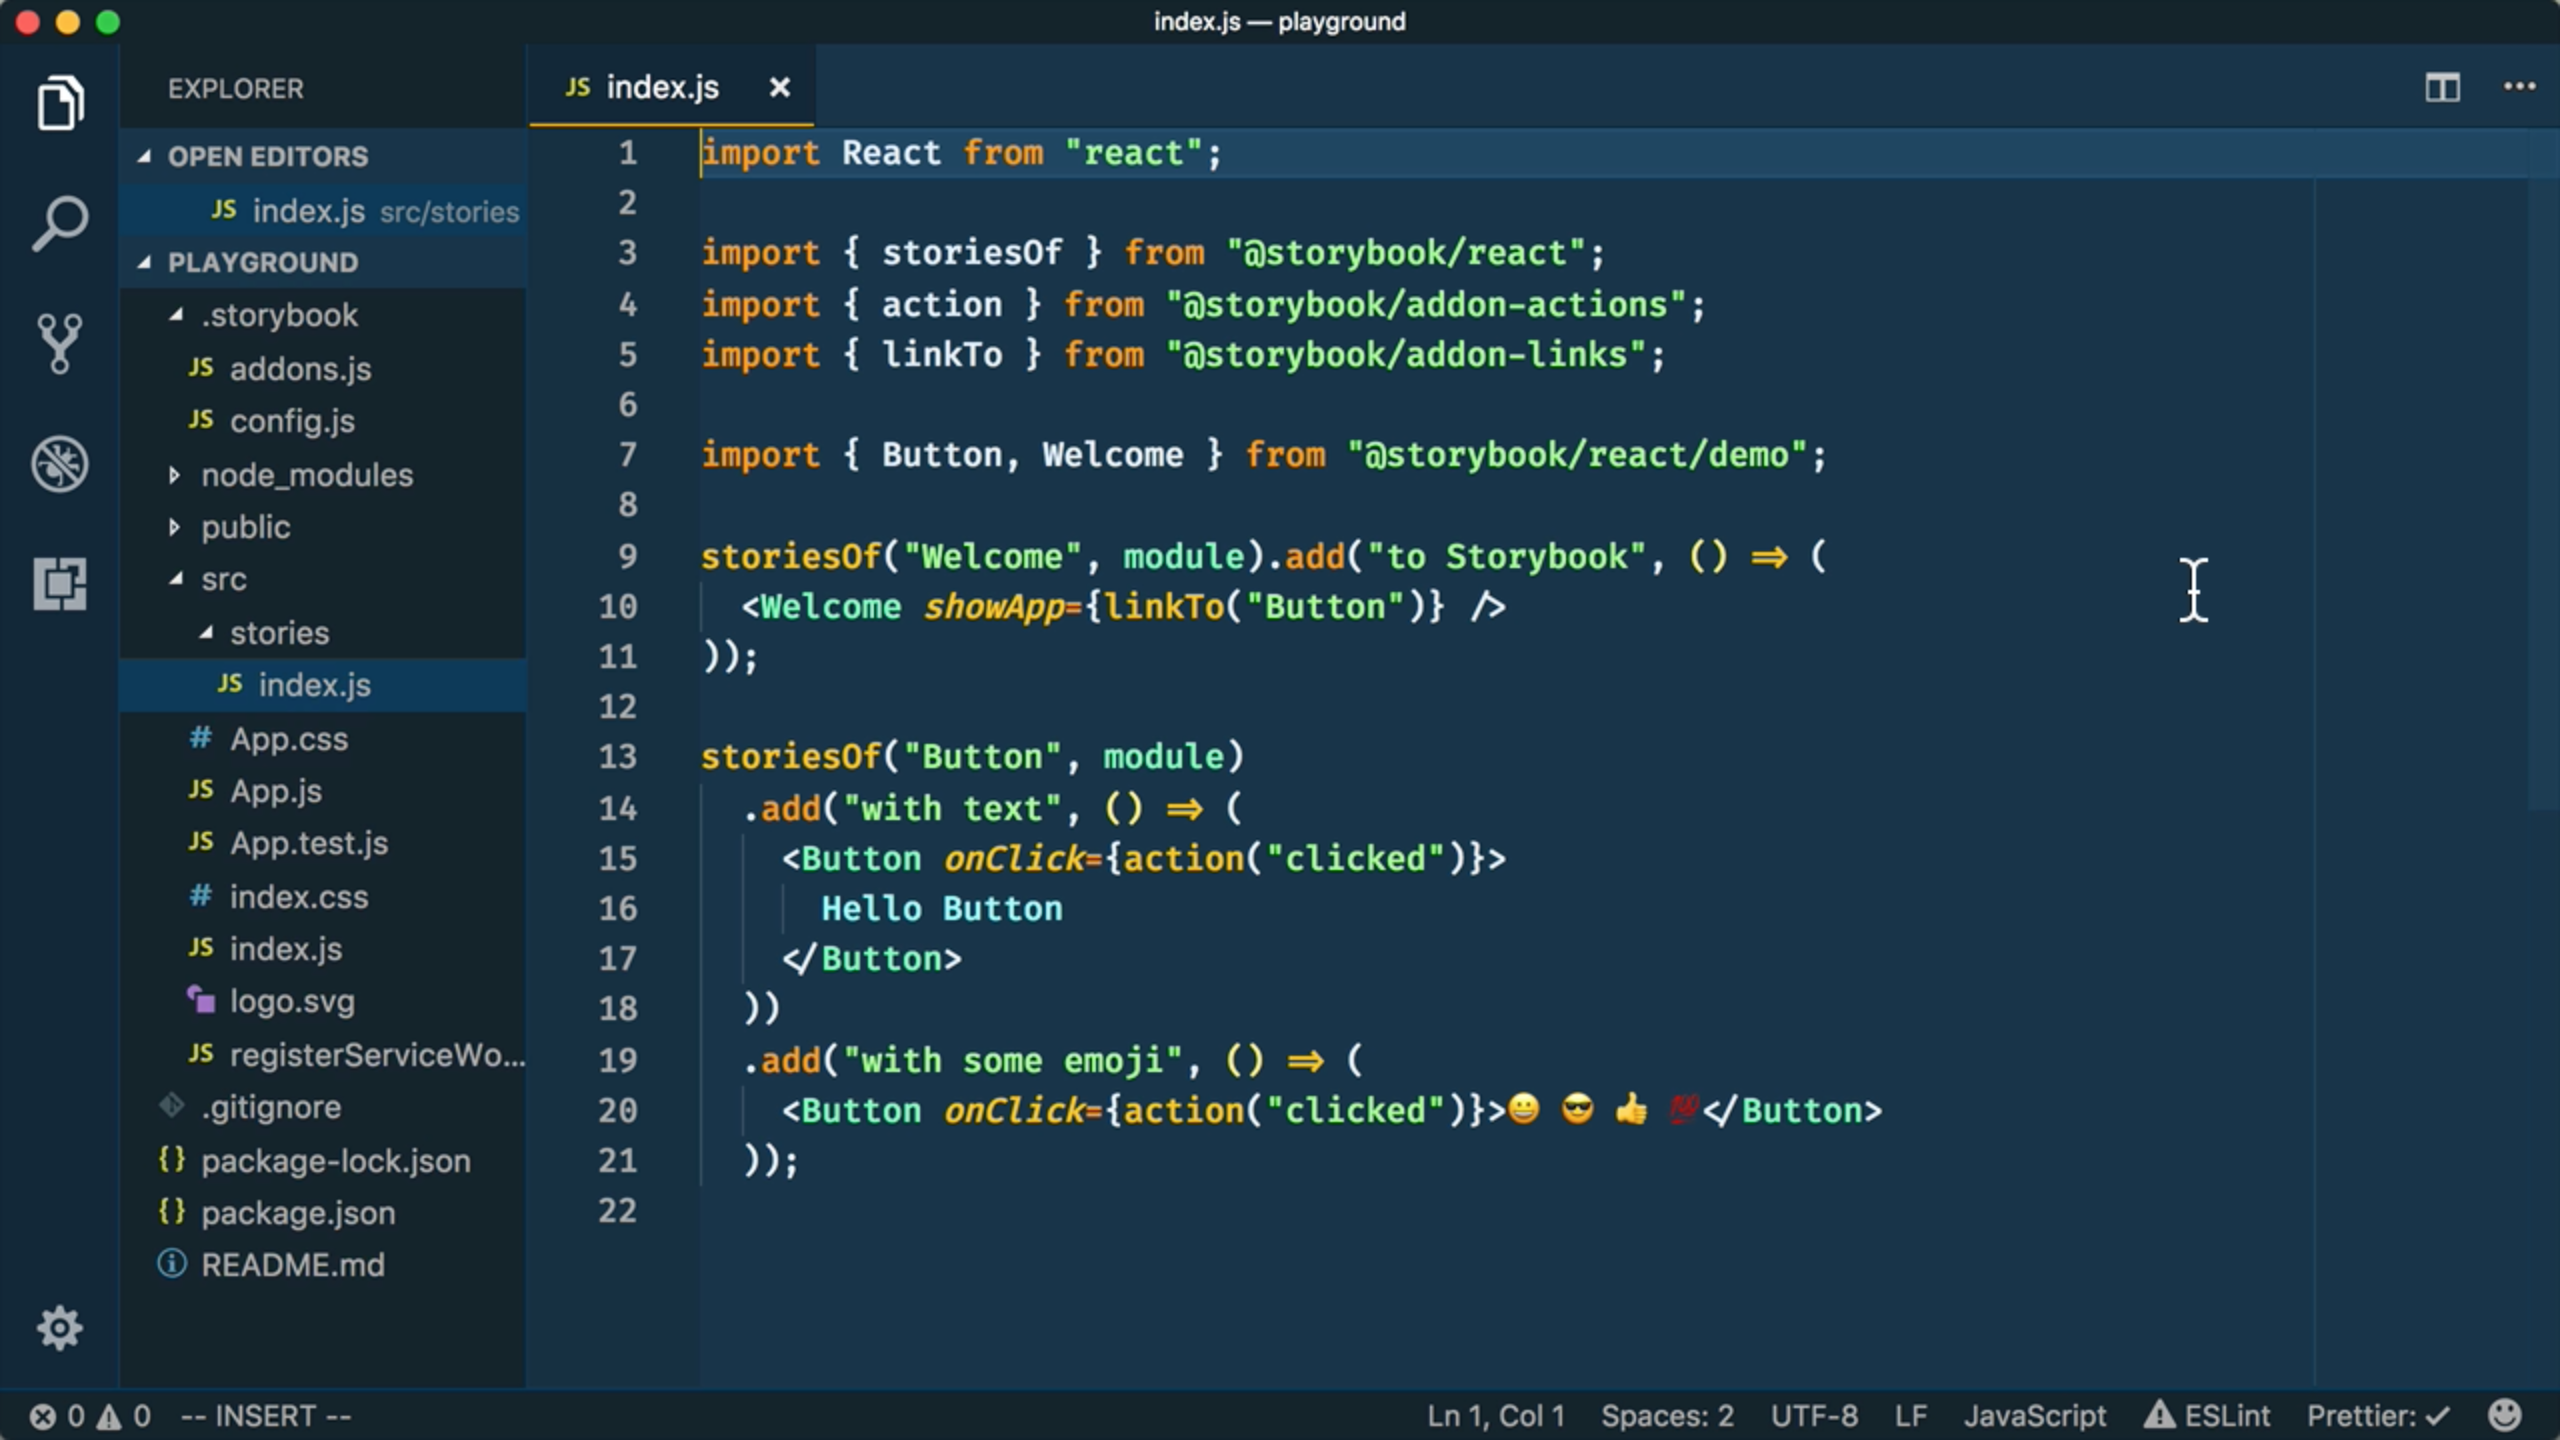
src/stories/index.js
Now, let’s take a look at the index.js file that storybook created in our src/stories folder. At the top, we import several items from storybook and our related addons.
import React from "react";

import { storiesOf } from "@storybook/react";
import { action } from "@storybook/addon-actions";
import { linkTo } from "@storybook/addon-links";

import { Button, Welcome } from "@storybook/react/demo";
import App from "../App";

storiesOf("Welcome", module).add("to Storybook", () => (
  <Welcome showApp={linkTo("Button")} />
));

storiesOf("Button", module)
  .add("with text", () => (
    <Button onClick={action("clicked")}>
      Hello Button
    </Button>
  ))
  .add("with some emoji", () => (
    <Button onClick={action("clicked")}>😀 😎 👍 💯</Button>
  ));
We have stories for two main components listed in this file, Welcome and Button. Both of these are samples that came from the storybook repo to get you started.
In the Button’s case, there are two examples stories listed for the Button component.
The linkTo addon can redirect to other components (such as the Button listed here) and the action addon lets you log actions of a component to a custom panel (in our case Button clicks will be logged).
package.json
Let’s briefly switch gears to the package.json file before we kick up the web server. You’ll notice that storybook added a couple of npm scripts for us to use. There is a storybook script that’ll kick up a developer server and a build-storybook script that’ll build a version of the style guide that you can host somewhere. As for dependencies, storybook added storybook/react, storybook/addon-actions, and storybook/addon-links to our devDependencies.
{
  "name": "playground",
  "version": "0.1.0",
  "private": true,
  "dependencies": {
    "react": "^16.2.0",
    "react-dom": "^16.2.0",
    "react-scripts": "1.1.1"
  },
  "scripts": {
    "start": "react-scripts start",
    "build": "react-scripts build",
    "test": "react-scripts test --env=jsdom",
    "eject": "react-scripts eject",
+   "storybook": "start-storybook -p 9009 -s public",
+   "build-storybook": "build-storybook -s public"
  },
  "devDependencies": {
+   "@storybook/react": "^3.3.13",
+   "@storybook/addon-actions": "^3.3.13",
+   "@storybook/addon-links": "^3.3.13"
  }
}
Kicking up the Storybook Dev Server
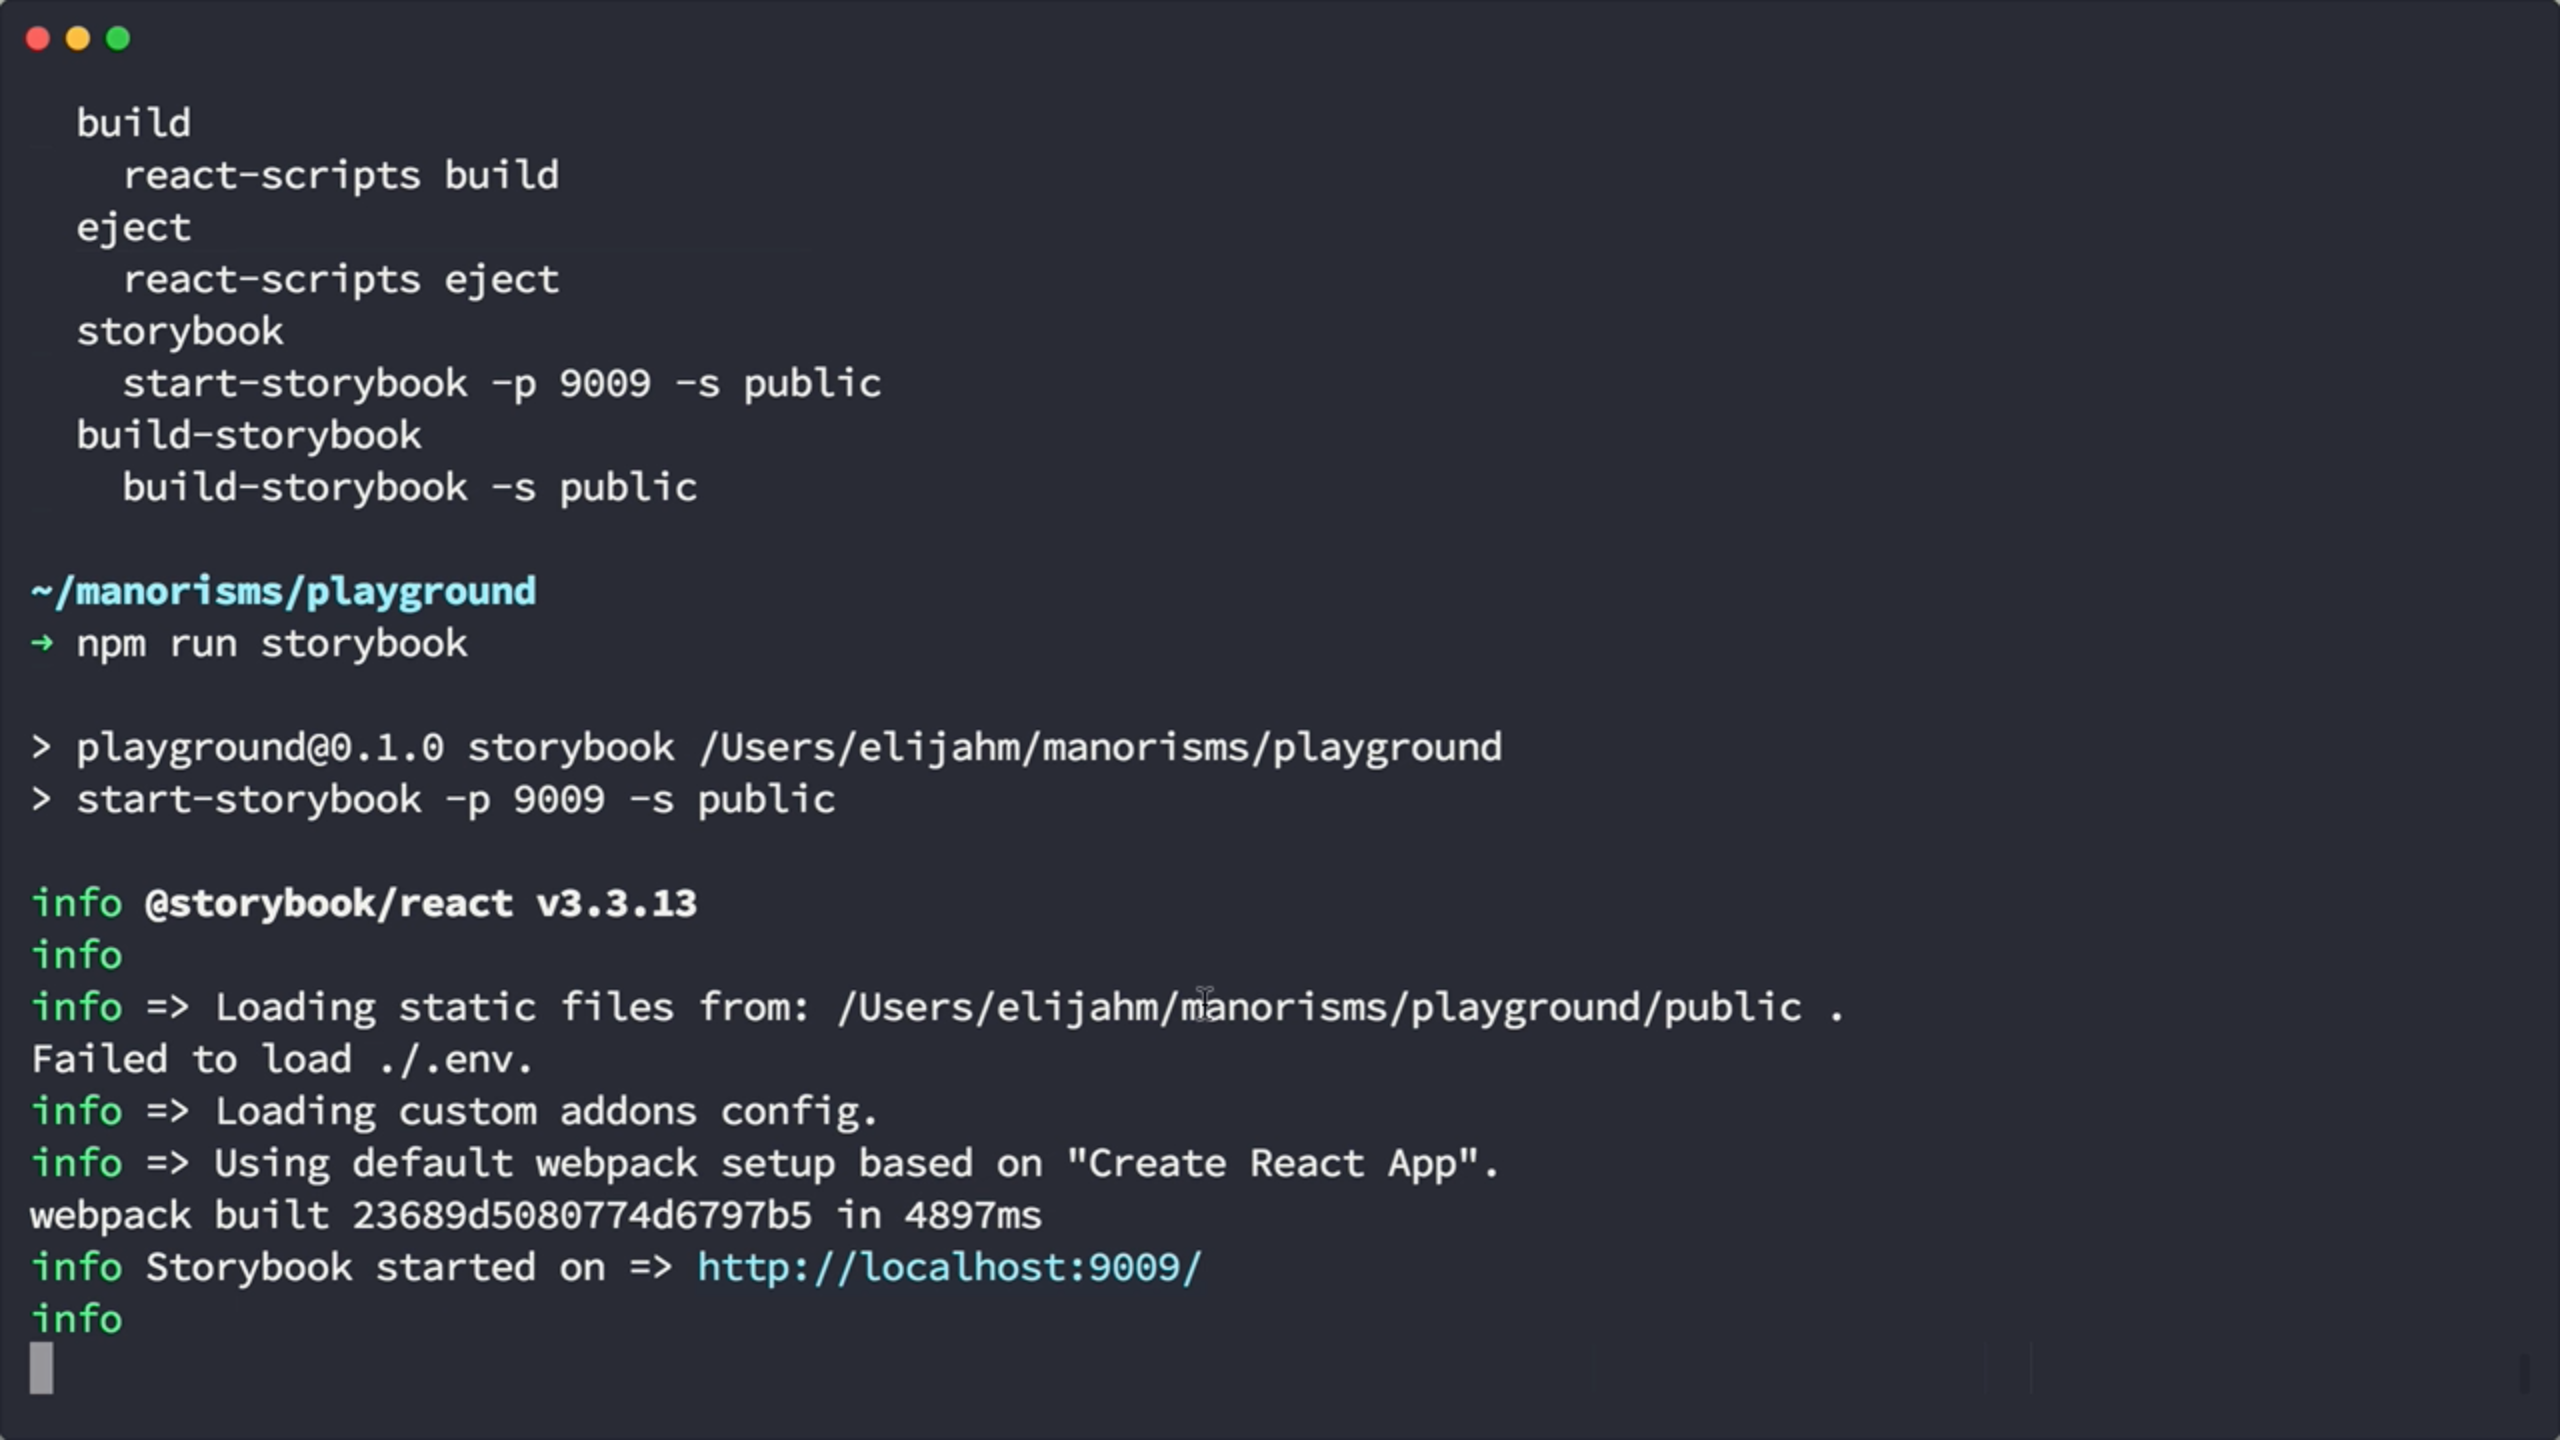
Okay, let’s move on to see what the style guide looks like. Back in our terminal we can type npm run to see all the scripts we have available, and as I mentioned earlier there is a storybook entry. So, to kick off a developer server we will execute npm run storybook. This will use webpack to build your react app and then start a web server on port 9009.
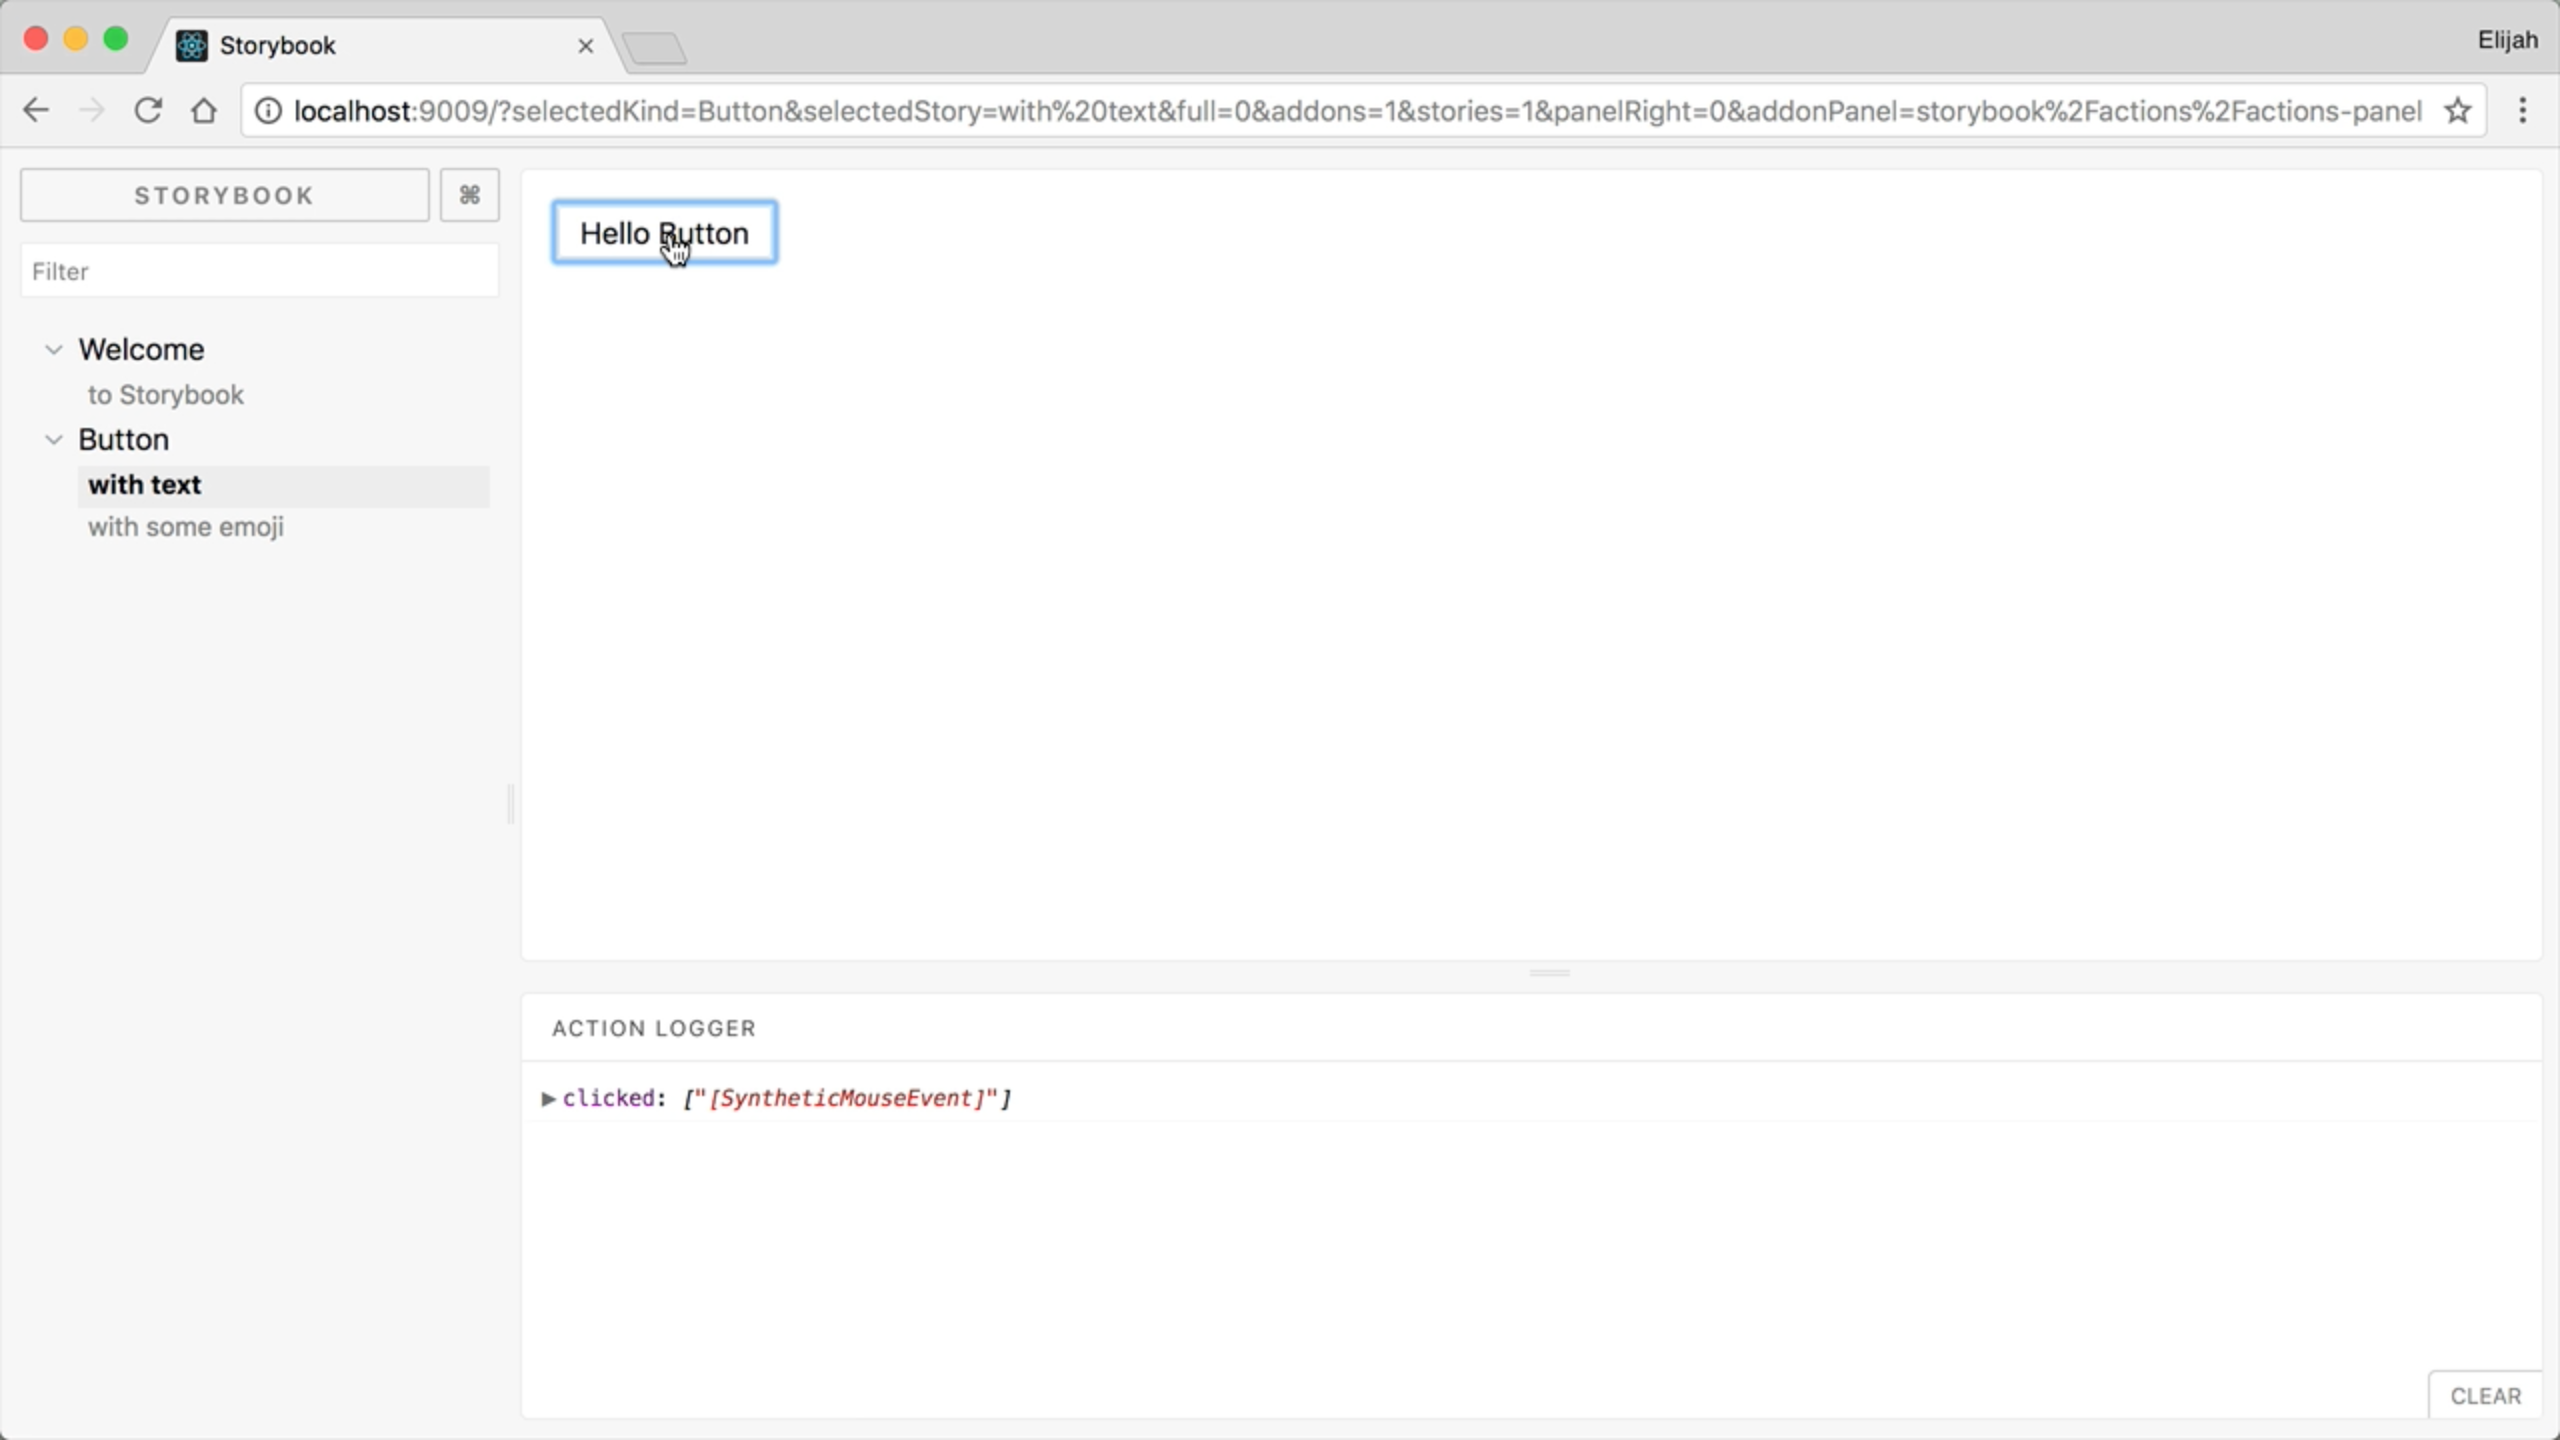
And now, you can open up a browser to navigate the style guide. The welcome page has some summary information with helpful information to get started. As we noted earlier, the links addon should redirect us to the Button component when we click on the “stories” link. Also, as we saw before, when we click on the Button… we will see the event logged in the panel below as a result of the action addon. Here we have another story for Button that shows using emojis instead of text. If we click on the button, it’ll also log it’s action in the panel below.
Adding a New Component Story
Now, let’s try adding our own story to storybook. Seeing that we just created our React app, there aren’t many components, however, there is the main App component that create-react-app generated, so let’s use that.
We will start by importing App from the App compoennt. And then we’ll copy the Welcome set of stories and rename it to “App” instead. Let’s name our first story as “default” and instead of the Welcome component we will reander the App component.
src/stories/index.js
import App from "../App";

// ... more code ...

storiesOf("App", module)
  .add("default", () => <App />);
Now, when we come back to the browser we should see our new App component, and if we open it, we’ll see our App rendered!

However, the App component doesn’t support any customizable props, so let’s fix that. We’ll come back over to VS Code and edit our App component. Let’s destructure the title prop from the component’s props and use it to dynamically render the title, instead of always saying “Welcome to React”. Before we move on we will give title a default value in case one is not passed to the component.
import React, { Component } from "react";
import logo from "./logo.svg";
import "./App.css";

class App extends Component {
  render() {
+   const { title } = this.props;
    return (
      <div className="App">
        <header className="App-header">
          <img src={logo} className="App-logo" alt="logo" />
          <h1 className="App-title">Welcome to {title}</h1>
        </header>
        <p className="App-intro">
          To get started, edit <code>src/App.js</code> and
          save to reload.
        </p>
      </div>
    );
  }
}

+ App.defaultProps = {
+   title: "React"
+ };

export default App;
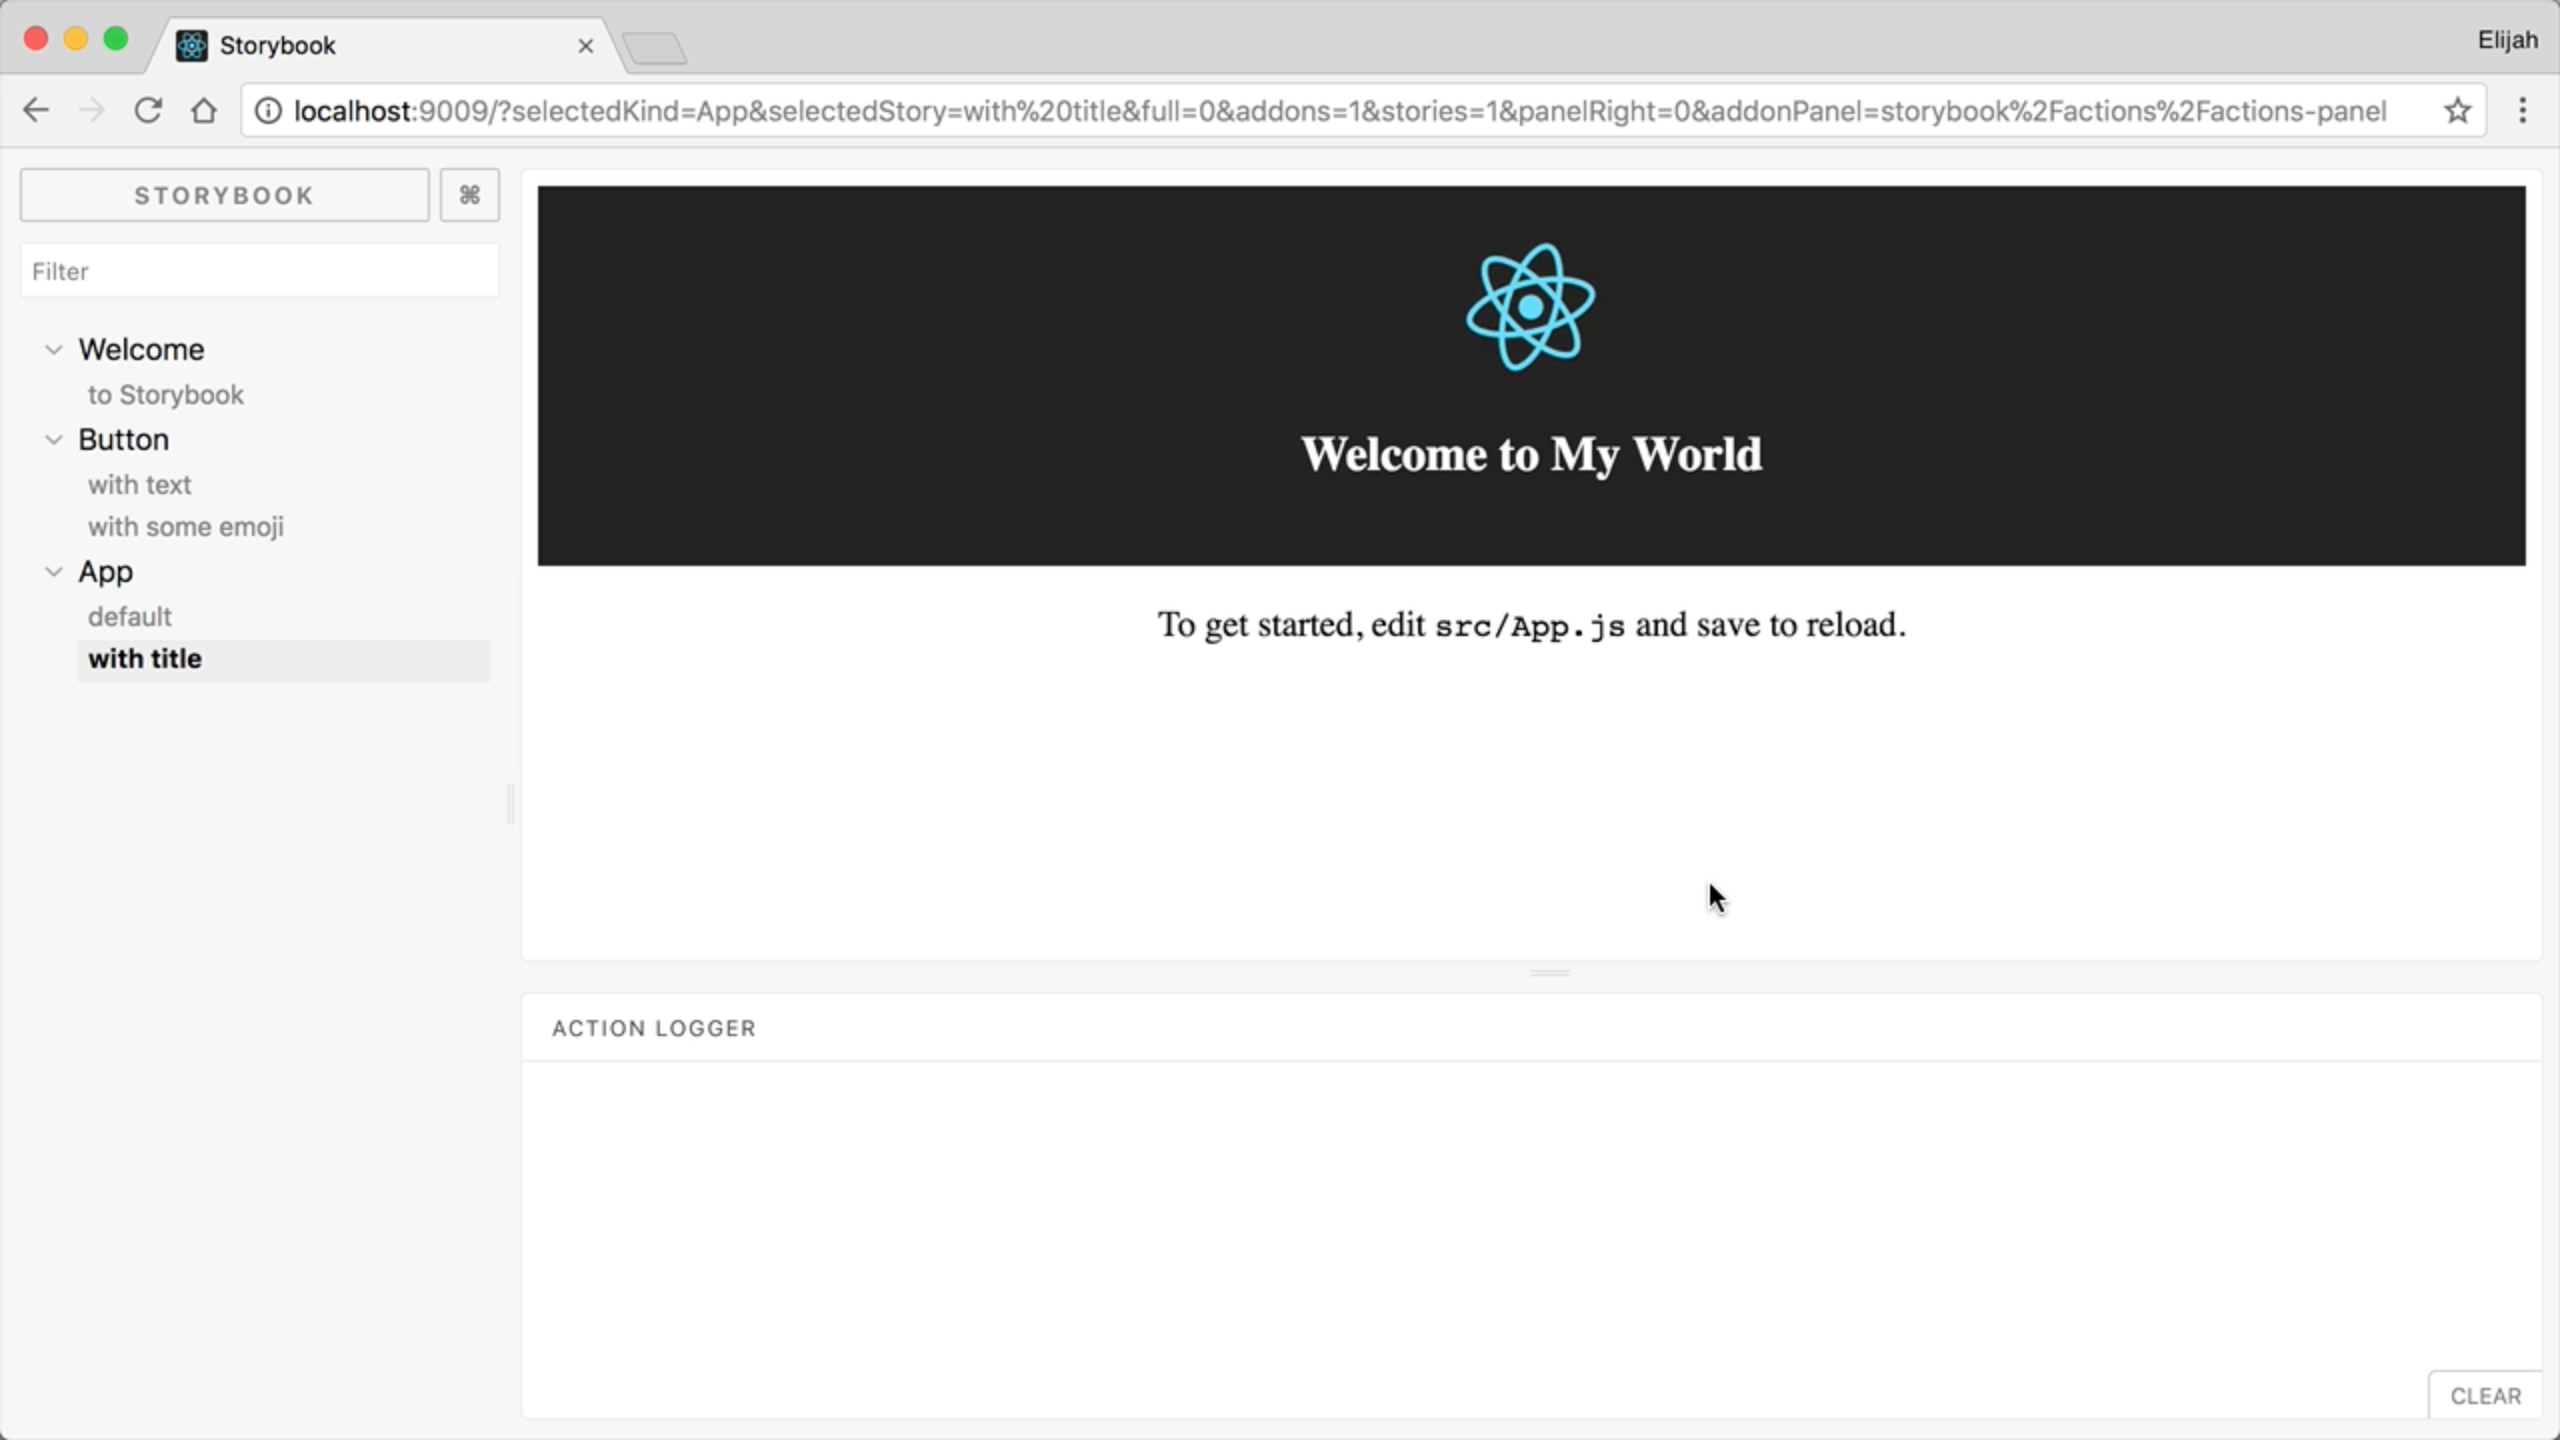
Now, we’ll switch back over to our src/stories/index.js file and add another story to the App component. We’ll call this one, “title” and pass it a title prop of “My World”.
import App from "../App";

// ... more code ...

storiesOf("App", module)
  .add("default", () => <App />)
+ .add("with title", () => <App title="My World" />);
If we come back to the browse, we will see a new entry under the App component listing hte new “with title” story and it’ll show “Welcome to My World”.
At this point, the stories are pretty static, but there are ways you can make your stories much more interactive. However, we won’t go into those in this blog post. If that interests you, please let me know on Twitter at @elijahmanor.
Building Storybook and Serving Locally
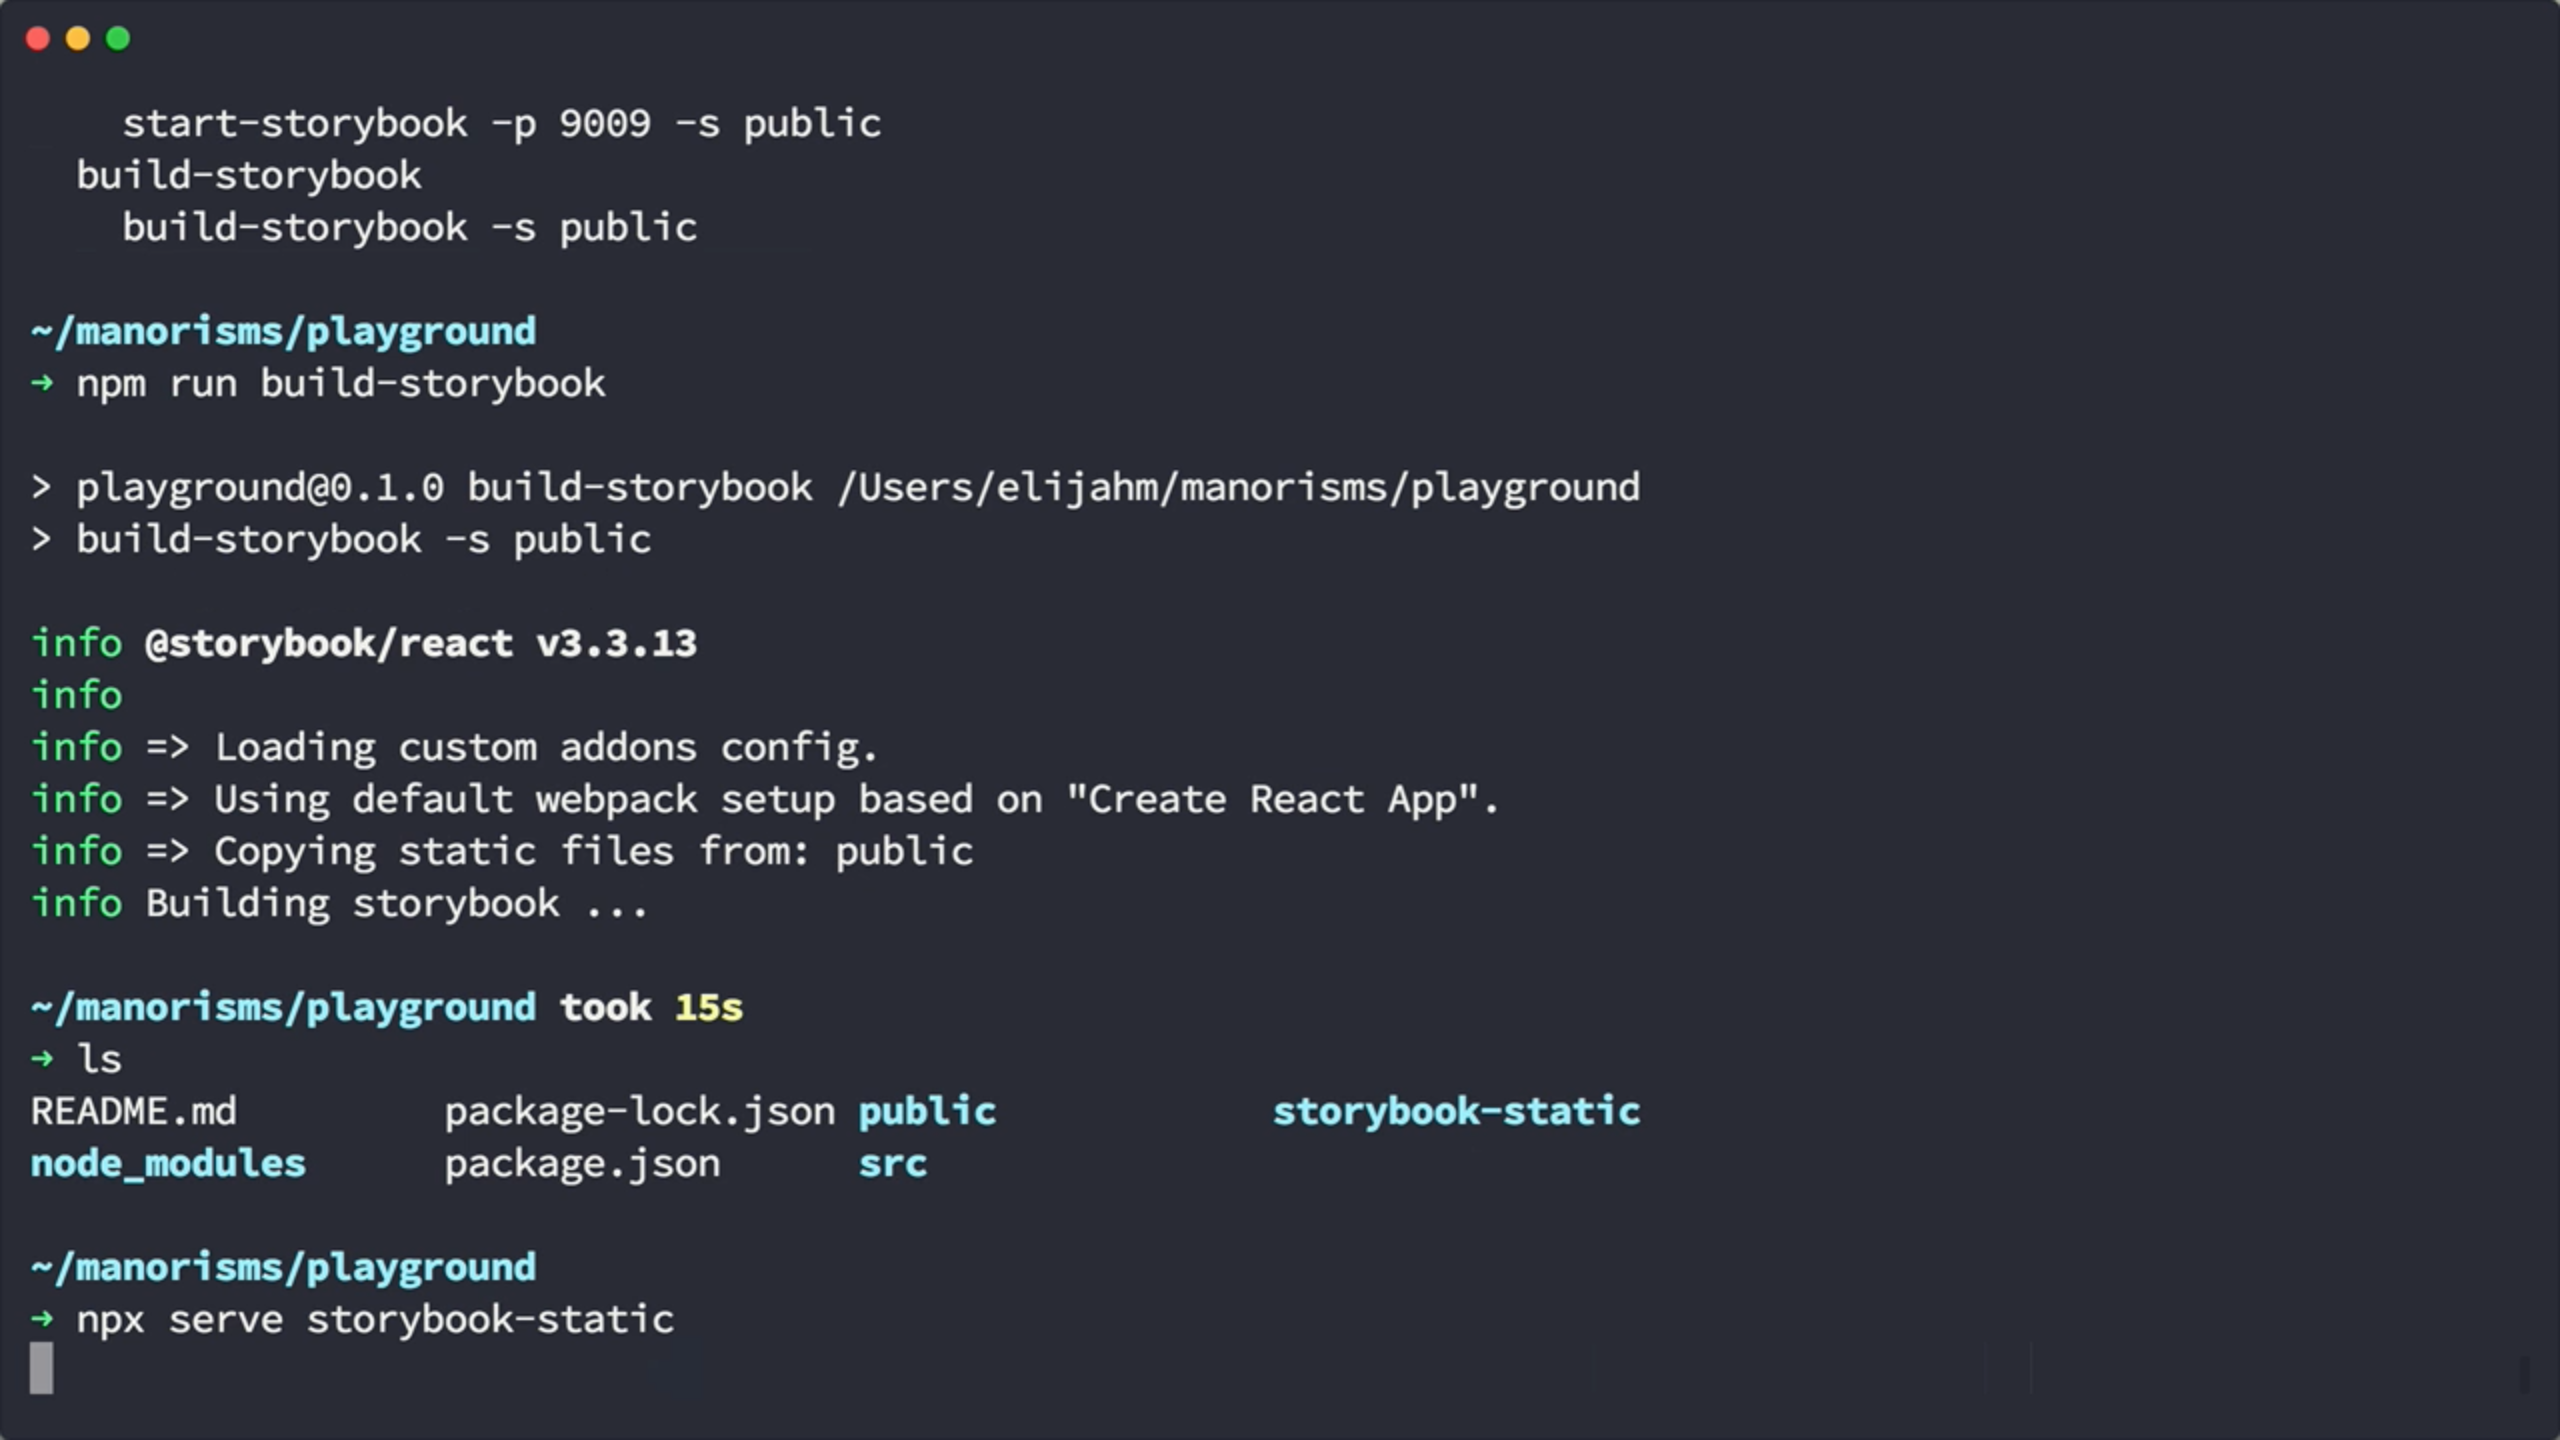
Now, let’s focus on building our style guide. We will cancel our dev server and type npm run build-storybook in the terminal. This will build a version of the style guide to a folder called storybook-static. Once it’s done you can kick up a simple http server to run the web app. In our case running npx serve storybook-static will suffice. And now we can navigate to localhost:5000 to see our static style guide. And sure enough, it works just great!
➜ npm run build-storybook
➜ npx serve storybook-static
Conclusion
Thanks for reading this third post in the create-react-app series. If you don’t already have a style guide solution, storybook is a nice and easy way to quickly get started building an interactive style guide.